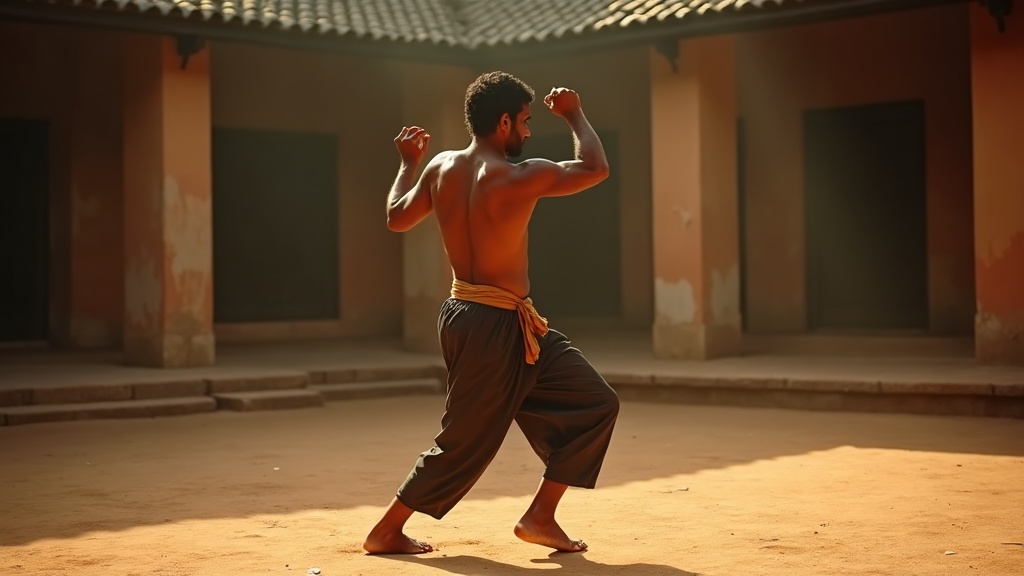
Kalaripayattu Practice at Home: What Works, What Doesn't
Kalaripayattu Practice at Home: What Works, What Doesn't
Last updated: 27 May 2026 — by Raphael Gorschlüter, Co-Founder & Head Teacher, Kalari University
Most guides on kalaripayattu practice at home tell you it cannot be done. The rest tell you it can be done anywhere, anytime, with a phone and a yoga mat. Both are wrong in roughly the same direction.
You found this practice. There is no school in your town. You have watched ten videos and you still do not know whether to step forward into a stance, sit on the floor, or wait until you can afford a flight to Kerala. The honest answer sits between the two loud voices on the internet — and it is a much more useful answer than either of them.
Solo home practice is not a watered-down version of real kalaripayattu. For the first months, it is exactly what every traditional student does: the same repeated shapes, the same low stances, the same swings of one leg, alone, until the body starts to remember. The teacher's job at that stage is correction, not introduction. So you can do that part. You just have to know where the line is. In this guide you will get the specific solo exercises by their traditional names, the minimum setup you actually need, an honest list of what to leave alone, and a thirty-day starter routine you can begin tomorrow morning.
Kalaripayattu practice at home is the solo, foundational portion of kalaripayattu — the traditional martial art from Kerala, India — performed in roughly three metres of clear space, barefoot, without weapons or a partner. It covers the lohar warm-ups, chuvadu stances, kaal etuppu leg exercises, and the foundational vadivu animal postures. It does not cover weapons, sparring, partner drills or marma work, all of which require a teacher in the room.
Key Takeaways
- Kalaripayattu practice at home covers the foundational meithari stage — warm-ups, stances, leg exercises and animal postures — and is exactly what every traditional first-year student also does in solo repetition.
- Weapons, sparring, partner techniques, and marma vital-point work cannot be self-taught and must wait for a teacher with eyes on you.
- A space of roughly three metres by two metres (about 10ft x 7ft), non-slippery, with bare feet, is the minimum setup; nothing else is needed for the first months.
- Two to three sessions per week of thirty to forty-five minutes plus a short daily breath-and-stance drill builds the foundation faster than daily exhaustion.
- The real feedback loop in solo practice is your own breath: if you cannot breathe through your nose, you are working too hard and the pattern will not land.
- After roughly thirty to sixty days of consistent solo work the same mistakes start repeating — that is the signal it is time for live feedback, not more repetition.
- Home practice is the place where the ability to feel your own movement actually develops, because there is no teacher to copy from. The absence of correction is the gift, if you stay slow.
Can You Really Practise Kalaripayattu at Home?
Yes — for the foundational, solo portion of the practice. No — for anything that needs another body or a sharp object. That is the whole answer and it has not changed in five hundred years.
In a traditional kalari — the earth-floored training space the practice is named after — the first stage of training is called meithari or meipayattu, which translates roughly as "body practice" or "body exercise." A new student arrives, the gurukkal (teacher) shows the shape of a stance or a kick, and then the student repeats that same shape for hours, days, weeks. The teacher walks past, watches, sometimes corrects, sometimes does not. Most of the work is the student alone with the floor.
If you remove the room and the other students, you remove some social fuel and some peer comparison. You do not remove the practice itself. What you lose is correction — and that loss is real, not trivial. We will come back to it. What you keep is everything that matters most in the beginning: the chance to put your body into a shape, hold it, leave it, return to it, and slowly let your nervous system memorise something it has never done before.
The two loud voices on the internet — "you cannot learn this without a guru, never try" and "download an app and you are training kalari" — are both selling something. The first is selling tradition as exclusion. The second is selling convenience as completeness. Neither helps you start on Tuesday morning in your living room with one square of carpet pushed aside.
A useful middle ground: solo practice is the beginning of kalaripayattu, not the replacement for it. Treat it as a real first chapter — slow, careful, repeatable — and the day you eventually meet a teacher you will not be starting from zero. You will have a body that knows what a low stance feels like, lungs that have learned to stay calm under load, and an attention that has begun to land in the feet.
I have trained students who came to a live workshop after eight weeks of disciplined solo work and were ahead of students who had taken three months of group classes. I have also met students who watched a hundred videos and arrived with confident, deeply ingrained errors that took a year to soften. The difference between the two is not the videos. It is whether the home practice was slow, breath-led, and honest about what it can and cannot do.
What You Can Safely Practise Alone
The foundational meithari work breaks into four families of exercise. All four can be practised solo, with no equipment, in the space you already have, as long as you move slowly, stay barefoot, and let your breath rule the intensity.
If you have not yet read a general orientation to the practice itself, the practitioner-written introduction to what kalaripayattu actually is gives the broader context — what the four stages are, what the disciplines cover, and where this solo foundational work sits inside the whole system.
Lohar — the warm-up sequence
Lohar is the systematic warm-up that opens every kalari session. It begins from the top of the body and works down — neck, shoulders, spine, hips, knees, ankles — through slow rotations, articulations, and breath-led spinal waves. It looks gentle from the outside. It is preparing every joint for the loading the body is about to do.
At home, ten to fifteen minutes of lohar before any other practice is non-negotiable. Cold ankles do not belong in a low stance. Cold hips do not belong in a deep horse posture.
What good looks like: breath stays nasal and unforced; each rotation is fully completed before the next begins; the body warms from the inside, not from speed.
Common mistake: rushing through lohar to get to the "real" practice. Lohar is the real practice. The day you understand that, your kalaripayattu changes.
Chuvadu — the stances and footwork
Chuvadu are the foundational stances — wide, low postures with the weight settled deep into the legs, and the transitional steps between them. The best-known are the horse stance, the lion stance, and the low forward stance. In a kalari, beginners spend weeks just holding these, then weeks more learning to step from one into the next without losing depth.
At home, hold each stance for five slow nasal breaths. Then transition to the next without rising up. The drop in your thigh muscles after thirty seconds in a real horse stance is the practice doing its job.
What good looks like: spine long and vertical; feet flat and the weight in the centre of each sole; knees tracking over the second toe.
Common mistake: the knees collapsing inward, the heels lifting, the back rounding. If any of these happen, come up two inches and re-set. Depth without alignment is just slow injury.
Kaal etuppu — the leg exercises
Kaal etuppu — literally "leg lifting" — are the swinging kicks that build hip mobility, balance, and the explosive control that later weapons work depends on. The four canonical exercises in many lineages are:
- Ner kaal — the straight forward kick, leg swung up and forward in one line
- Otta kal — the round kick, leg swung in a wide arc from outside to inside
- Kone kaal — the cross kick, leg swung diagonally across the body
- Veechu kaal — the side kick, leg swung laterally with a vertical torso
For home practice, perform each one slowly, ten times per leg, with full breath. Do not chase height. Chase line and balance. A waist-high kick with a stable standing leg is worth ten head-high kicks where the supporting foot wobbles.
What good looks like: the standing leg stays quiet; the kicking leg returns to standing without falling; the breath does not catch in the chest.
Common mistake: swinging fast for height, then bracing the standing leg with a locked knee. Slow, low, controlled. Always.
Vadivu — the animal postures
Vadivu means "posture" or "form" — specifically the animal-modelled body shapes that train deep strength, low-line awareness, and the felt qualities of different creatures. The foundational vadivus most lineages teach first are:
- Ashva vadivu — the horse, a deep wide squat with grounded power
- Simha vadivu — the lion, low and ready, paws forward
- Gaja vadivu — the elephant, broad and rooted, heavy through the feet
- Sarpa vadivu — the snake, low to the floor with a long spine
- Marjara vadivu — the cat, agile and feline
You can practise the first two or three at home. Hold each for ten slow breaths, then release. Treat them as full-body postures, not as static poses — there is breath, there is subtle micro-movement, there is the quality of the animal alive in your body.
What good looks like: the posture stays alive — breath moving, weight subtly shifting, eyes soft and attentive.
Common mistake: holding stiffly, like a photo. A vadivu is a body — and bodies breathe and shift.
These four families — lohar, chuvadu, kaal etuppu, vadivu — together form roughly ninety percent of meithari. They are what every traditional student spends the first months on. They are what you can practise at home today.
What You Should Not Practise at Home
The same lineage that says "yes, practise meithari alone" also says "no, do not touch the rest until you have a teacher." This is not gatekeeping. It is a load and safety calculation made by people who watched the consequences for two thousand years.
Four categories belong on the do-not-touch list:
Weapons of any kind. Kalaripayattu's second and third training stages — kolthari (wooden weapons: stick, short club, curved stick) and angathari (metal weapons: dagger, sword and shield, spear) — are extraordinarily dangerous to learn alone. A misjudged stick swing in a small room hits a lamp or a wrist. A self-taught sword grip teaches your hand the wrong relationship with a blade you may eventually hold for real. Even the sticks used in stick-fighting traditions worldwide require partner conditioning the body has to learn under supervision. Wait for a teacher.
Partner techniques and sparring. Obvious, but worth stating. The fourth stage of the system — verumkai, bare-hand combat — assumes the conditioning of the previous stages and is taught with a controlled partner and immediate feedback. There is no solo substitute.
Marma work — the vital points. The 107 marma points are sites of energetic and anatomical convergence used in both kalari striking and kalari healing. Knowing where they are intellectually is one thing; using touch precisely, safely, therapeutically, or martially is something only a teacher can transmit. Reading about marma in a book is not learning marma. Practising marma alone is not even possible — it requires another body.
High jumps, hard landings, advanced floor work on a hard floor. The romantic photographs of kalari practitioners mid-leap above a clay floor exist for a reason — the floor is clay, soft and forgiving, packed and prepared over years. Your wooden, tile, or concrete floor is not. Stay at the height your floor allows for safe landings. Save the rest for a real kalari.
If you stay inside the safe four families and outside these four no-go zones, you can train consistently and meaningfully for months at home before the next step is necessary.
Your Home Setup — Space, Floor, Clothing
Almost nothing is needed, and what is needed matters more than people think.
Space. The minimum is roughly three metres by two metres — about ten by seven feet. Enough to step into a low stance, swing one leg in a full arc without contact, and lower to the floor for a vadivu without your head hitting a shelf. If you can extend your arms wide and turn in a slow circle without bumping anything, you have enough room. A small living room corner, cleared of the coffee table, will do. A garage, garden patio, or basement is better if available.
Floor. Flat. Non-slippery. Ideally wood, cork, or a thin firm mat. Tile is too cold and too hard on the joints over time. Carpet that grabs the foot prevents the pivoting that good chuvadu requires — and traps moisture that builds blisters. The traditional clay floor of a kalari is unmatched for shock absorption, but a smooth wooden floor in a well-aired room is a strong substitute.
Footwear. None. Always barefoot. The thirty-three joints, hundred-plus muscles and tendons, and dense sensory receptors in the human foot are the entire foundation of kalaripayattu's footwork. The Cleveland Clinic's guide to foot anatomy and mobility gives a sense of how much the foot contains; shoes mute all of it. The work of kalari is built on the constant flow of information from the sole of the foot to the brain. Wear nothing. If your feet are stiff and unhappy in the first sessions, that is the practice already working.
Clothing. Loose enough to let the hip open into a deep squat. Trousers with a wide leg, drawstring shorts, a flexible t-shirt. Avoid jeans, restrictive leggings, anything that pinches the knee or the groin. The traditional kachcha — a long cotton loincloth wrapped over and between the legs — exists for very specific reasons of friction, heat regulation and freedom of movement, but it is not required at home. Comfortable, loose, breathable cotton or linen is enough.
On sesame oil and red earth. Traditional kalaripayattu uses sesame oil applied to the body before practice and Ayurveda-style massage (uzhichil) given by the teacher between sessions. The reasons are real: oil cools the skin in heat, warms the deep tissue before practice, and protects the joints from repeated impact on the packed earth floor. None of these conditions apply at home. You are practising barefoot on a smooth dry floor in moderate temperature with no impact. Oil is optional, and if applied makes a wooden floor genuinely dangerous. Skip it. Hydrate well before practice, warm thoroughly through lohar, and let the tradition adapt to your room rather than chasing the tradition into a context that does not exist for you.
A practical rule: do not fake the tradition, but do not ignore it either. Understand why each element exists, and ask whether your version honours the reason. A clean wooden floor and a thorough warm-up honours the reason for the clay floor and the oil. A slippery oiled body on a slippery wood floor does not.
How Often and How Long
The biggest mistake in home practice is also the simplest to fix: practising too much, too hard, too rarely.
The pattern that builds the foundation fastest, in my experience teaching over the last twelve years, is two to three sessions of thirty to forty-five minutes per week, with a short five-to-ten-minute daily drill on the off-days. The longer sessions do the structural work — lohar, full kaal etuppu sets, sustained vadivu holds. The daily short drill keeps the pattern alive in the nervous system between sessions: ten slow squats, three minutes of nasal breath, a single round of leg swings.
A different pattern that almost always fails: one ninety-minute session every Sunday. The body forgets the shape across the week, every Sunday rebuilds from near-zero, no foundation accumulates. This is the most common reason home students plateau.
The reason for the rest day is not laziness. It is consolidation. The nervous system rewires new motor patterns during the recovery window after a stimulus. Without that window, the pattern stays surface-level. The body is willing to repeat what you ask of it on Monday, Wednesday and Friday far longer than what you ask of it daily.
Your single most reliable tool for pacing is nasal breath. Kalaripayattu, like most serious traditional practices, treats breath regulation as the central feedback loop, not as a separate exercise. The rule for solo practice: if you cannot breathe in and out through your nose at a steady rate, you are working too hard. Slow down. Drop one inch of depth from your stance. Reduce the leg-swing height. The body builds into the breath, never beyond it.
This is also the discipline that protects you in solo practice. A teacher in the room can spot the moment your form fails. At home, your breath has to tell you, because nothing else will. A nose that is gasping is the only correction you need. The same principle of slow, breath-led training is also the foundation of body awareness as a daily movement practice — the deeper reframe of why solo work can build something a noisy class often cannot.
Session length progression that works for most adult beginners:
- Weeks 1–2: twenty minutes, two sessions per week. Mostly lohar and chuvadu.
- Weeks 3–4: thirty minutes, three sessions per week. Add kaal etuppu.
- Weeks 5–8: forty-five minutes, three sessions per week. Add vadivu.
- Weeks 9+: maintain the rhythm. Add depth, not duration.
Daily off-day drill across all phases: five to ten minutes of slow squats, breath work and a single round of one kaal etuppu exercise. Twenty repetitions of nothing in particular, but with full attention.
Your First 30 Days — A Starter Routine
Below is a concrete four-week starter plan you can begin tomorrow. It is built around the constraints of home practice: limited space, no teacher, no equipment, the need to build slowly. It assumes you are in reasonable general health and have no acute joint injuries. If anything hurts, stop. If anything feels off in a way you cannot name, stop and find a teacher before you continue.
Week 1 — Lohar and Chuvadu only
Goal: meet the warm-up, settle into the two foundational stances.
| Day | Session |
|---|---|
| Mon | 20 min — 10 min lohar, 10 min horse stance / lion stance (hold 5 breaths, rise, repeat) |
| Wed | 20 min — same as Monday |
| Fri | 20 min — same |
| Off-days | 5 min slow squats + nasal breath |
By Friday of week one your hips will feel different. The horse stance at 20 seconds will feel impossible. Stay slow. Do not add anything yet.
Week 2 — Add Kaal Etuppu
Goal: introduce the leg swings, very slowly. Hip mobility is the gate.
| Day | Session |
|---|---|
| Mon | 30 min — 10 lohar, 10 chuvadu, 10 kaal etuppu (slow ner kaal + otta kal, 10 each leg) |
| Wed | 30 min — same |
| Fri | 30 min — add kone kaal (10 each leg) |
| Off-days | 5–10 min squats, breath, single round of ner kaal |
Do not chase height. A waist-high slow kick is the entire goal for week two. The standing leg should not wobble.
Week 3 — Add the First Two Vadivu
Goal: introduce ashva vadivu (horse) and simha vadivu (lion) as full-breath postures.
| Day | Session |
|---|---|
| Mon | 35 min — 10 lohar, 8 chuvadu, 10 kaal etuppu, 7 vadivu (ashva, hold 5 breaths, rise, repeat) |
| Wed | 35 min — add simha vadivu in addition to ashva |
| Fri | 35 min — alternate ashva and simha, 3 holds each |
| Off-days | 5–10 min — squats, breath, one vadivu hold |
The vadivu work will surface tightness in the inner thighs, hips and feet. Welcome it. Stay nasal.
Week 4 — Full Beginner Sequence
Goal: a complete forty-five-minute meithari session you can repeat for months.
| Day | Session |
|---|---|
| Mon | 45 min — 12 lohar, 10 chuvadu, 13 kaal etuppu (all four), 10 vadivu (ashva, simha) |
| Wed | 45 min — same |
| Fri | 45 min — same |
| Off-days | 5–10 min daily drill |
By end of week four you have built the spine of a home kalari practice. From week five onward the question becomes depth rather than novelty: same exercises, lower, longer, quieter, more attentive. That is meithari.
If you want to deepen the same shapes with structured live guidance instead of doing every step alone, the free first lesson at Kalari University walks you through one foundation movement with cues and breath patterns recorded by Raphael — no payment, no commitment, just one structured starting point alongside your home work.
When Home Practice Is Not Enough
Solo work has a ceiling. The whole point of the discipline above is to build the foundation that gets you to the ceiling cleanly. After roughly thirty to sixty days of consistent home practice, you will start to notice three signals:
Signal one: the same mistakes keep coming back. You can feel the knee collapsing in horse stance for the tenth session in a row, but you cannot quite fix it. That is the moment external eyes start to matter more than another month of repetition.
Signal two: your stances stop deepening. The first weeks always bring obvious gains. After about six to eight weeks, the gain rate drops sharply if there is no correction loop.
Signal three: you want what comes next. You start to feel the absence of the weapons stage, the partner work, the higher-order vadivu. That hunger is exactly what the system is designed to produce — and exactly what cannot be answered alone.
Three options open up at that point. None of them are mutually exclusive.
Live online classes with a teacher who watches you train. This is the practical middle path for most students outside India and Kerala — structured curriculum, real-time correction, peer cohort. The honest practitioner's guide to learning kalaripayattu online covers what online can and cannot deliver, with no school-by-school sales pitch.
A workshop or retreat. Two days, a week, two weeks of in-person work compresses months of solo correction. A retreat especially — daily training, the same teacher across days, peer practice — does what no other format does. We run an annual retreat in Tiruvannamalai at the foot of Arunachala in August, but any reputable kalari running an immersion of at least a week will do this work.
A local teacher. If a real kalaripayattu teacher lives within reasonable travel distance, this beats all other options. They are rare outside India and parts of Europe, but worth searching for thoroughly before settling for online.
YouTube alone, without one of the above, almost always plateaus inside two months. There is no feedback loop. Watching a different teacher each week confuses the pattern instead of refining it. Use video as a reference, never as a replacement for live eyes.
A Note on Solo Practice and Body Awareness
There is one underrated advantage to practising alone, and it is so often missed that it is worth its own short section.
In a class, your attention naturally goes outward — to the teacher, to other students, to the mirror, to whether your shape looks correct. In solo home practice, none of those references exist. There is only your body, the floor, the breath, and your own attention. The absence of correction is not only a loss. It is also a gift, if you stay slow and honest.
This is the place where the ability to feel your own movement actually develops. Not the ability to copy a teacher accurately, but the older, deeper ability to know — from inside — whether the stance is settled, whether the kick is balanced, whether the breath is calm. This is what proprioception — the body's internal sense of itself in space — actually trains under load. Kalari was building this capacity centuries before the word existed.
Treat your home practice as that training. Each repetition is not "did I do it right" but "what did I just feel." Each stance is not a photo to match but a body to listen to. This is the part of the practice that no online class, no in-person teacher, and no thousand-dollar workshop can give you directly. They can only give you the conditions. The feeling itself is yours alone. If you are curious about why this kind of slow, body-led discipline matters in the first place, the six honest reasons people actually arrive at kalaripayattu practice covers the human side of the question.
Common Mistakes in Home Practice
The same five errors appear in almost every solo student who eventually arrives at a live class. Catch them early at home and your foundation is real.
Mistake one — going too fast. Speed feels like effort. Effort feels like progress. Neither is true in meithari. The exercises were designed slow and low. Speed is added at much higher stages, after years of slow foundation. At home, when in doubt, slow further.
Mistake two — skipping lohar. The temptation is to feel like you are getting "more" practice by cutting the warm-up. You are getting less. Lohar prepares the joints; without it the loading in chuvadu and vadivu lands on cold tissue and the work becomes injury risk instead of conditioning.
Mistake three — chasing depth in stances before alignment. The horse stance is meant to be deep. It is also meant to have a vertical spine and knees tracking over the second toe. If depth costs alignment, depth is wrong. Come up two inches and rebuild.
Mistake four — breath in the chest. The breath should fill the lower belly first, then the chest, slowly and through the nose. If your breath is high, shallow, and through the mouth, your nervous system is reading the practice as a threat. Stop, rest, return slower.
Mistake five — collecting more exercises instead of deepening fewer. A common pattern: each week the student adds three new things found on YouTube. After a month, twenty half-learned shapes and no foundation. The fix: master the four families above in their slow form. That alone is six months of work, and worth every day of it.
If you find yourself making one of these mistakes, the correction is the same in every case: less, slower, more attentive. Kalaripayattu rewards depth, not collection.
Frequently Asked Questions
Can you really learn kalaripayattu at home?
You can learn the foundational solo portion of kalaripayattu at home — the meithari work that every traditional student also practises alone for the first months. What you cannot self-learn is the partner work, weapons, sparring and marma. For the first thirty to sixty days, disciplined home practice gives you exactly what a traditional kalari would, minus the social fuel and the live correction.
How much space do you need to practise kalaripayattu at home?
Roughly three metres by two metres — about ten by seven feet — is enough for the first months. You need room to step into a low horse stance, swing one leg through a full arc without hitting a wall, and lower to the floor for an animal posture. Larger is better for advanced kaal etuppu and full vadivu work, but not required to begin. A cleared living room corner usually does it.
What kalaripayattu exercises are safe to practise alone?
The four foundational meithari families — lohar (warm-ups), chuvadu (stances), kaal etuppu (leg exercises) and the first foundational vadivu (animal postures) — are safe to practise alone, slowly, on a non-slip floor, barefoot. Once you have seen the shape performed correctly, repetition at low intensity carries roughly the same risk profile as a careful yoga session. Speed, height, weapons, partners, and jumps all change that calculation.
How often should you practise kalaripayattu at home?
Two to three thirty-to-forty-five-minute sessions per week, plus a short five-to-ten-minute daily drill of stances and breath on off-days, builds the foundation faster than daily long sessions. The nervous system needs the rest day between loadings to consolidate the new pattern. One ninety-minute session per week almost always fails — the body forgets across seven days.
Do you need a teacher to practise kalaripayattu?
You can start the foundational solo work without a teacher and make real progress for thirty to sixty days. You cannot pass through the second stage of the system (weapons), and you cannot reach the third or fourth, without one. The pattern most students settle into is: solo home practice for the foundation, then live online classes or workshops to break through the first ceiling, then in-person training for the higher stages.
How long does it take to see progress with home practice?
Most students who practise three times a week for thirty to forty-five minutes notice clearer balance and softer landings within two weeks, deeper stances and quieter breath within six weeks, and an actual change in how they walk and stand by month three. The change is felt before it is visible. Progress is not the depth of your squat; it is whether the squat is starting to feel like home.
Should you apply oil before kalaripayattu practice at home?
Traditional kalari uses sesame oil to warm the muscles and protect the joints from repeated floor contact on packed clay. At home, on a smooth wooden floor without impact work, oil is optional and can be actively dangerous on a hard floor. A thorough ten-minute lohar warm-up and good hydration do the same job for solo foundational practice. Save oil for in-person training where the floor and the supervision both account for it.
What should you avoid practising at home without a teacher?
Avoid all weapons (sticks, swords, daggers), partner work and sparring, marma vital-point practice, and high jumps or hard landings on a non-shock-absorbing floor. These need a teacher in real time and conditions a home setup cannot provide. The risk of self-taught weapons or marma is not theoretical — both have produced serious injury in students who tried.
Is YouTube enough to learn kalaripayattu at home?
YouTube is enough to see what the foundational exercises look like and to copy the basic shape. It is not enough to correct what your own body is actually doing. Most YouTube-only students plateau inside four to six weeks because they have no feedback on whether their pattern is improving or hardening into error. Use video as reference, then add live correction — even occasional — for any real progress beyond two months.
Is kalaripayattu safe for beginners practising alone?
The foundational meithari work — slow stances, controlled leg swings, deliberate animal postures, breath-led warm-ups — is approximately as safe as a careful yoga session when practised slowly on a non-slip floor, barefoot, with full warm-up. Risk rises sharply with speed, weapons, jumps or partner work. The rule for solo safety: slower than you think, lower than you can hold, only as deep as your breath stays calm.
Why is kalaripayattu always practised barefoot?
Barefoot training keeps the small foot muscles active, allows the toes to grip the floor for balance, and gives the nervous system uninterrupted sensory contact with the ground. Shoes mute most of this. Kalaripayattu builds its entire footwork system on the constant flow of information from the sole of the foot — shoes remove the very feedback loop the practice is built on.
When should you stop practising kalaripayattu alone and find a teacher?
When the same mistake keeps repeating session after session, when your stances stop deepening despite consistency, when your breath stays high in the chest after the warm-up, or when you start hungering for weapons or partner work — those are the signals. Roughly thirty to sixty days of consistent solo practice surfaces those edges for most students. After that, live eyes on you matter more than another month of repetition.
Sources & Further Reading
- Kalaripayattu — Wikipedia — historical overview, training stages, regional styles, weapons curriculum.
- Indian martial arts — Wikipedia — broader context for where kalari sits among Sangam-era and later Indian fighting systems.
- Kerala — Wikipedia — the South Indian state where the kalari system originated and was preserved through the colonial ban.
- Marma (Indian medicine) — Wikipedia — the 107 vital points used in both kalari striking and kalari healing.
- Ayurveda — Wikipedia — the traditional medical system whose injury and bodywork knowledge fed the uzhichil and kalari chikitsa traditions referenced in the oil section.
- Pranayama — Wikipedia — the broader Indian science of breath regulation behind the nasal-breath principle used in this guide.
- Sesame oil — Wikipedia — properties, traditional uses, why kalari adopted it specifically for pre-training application.
- Tiruvannamalai — Wikipedia — the Tamil Nadu town at the foot of Arunachala where our annual retreat is held.
- Foot anatomy and mobility — Cleveland Clinic — clear medical overview of the 33 joints and 100+ muscles, tendons and ligaments that explain why barefoot training matters.
- Proprioception — Cleveland Clinic — the body's internal sense of itself in space, the capacity solo home practice actively trains.
- Barefoot — Wikipedia — historical and anatomical background on barefoot movement as the human default.
- Guru — Wikipedia — the broader Indian concept of teacher, of which gurukkal (master of the kalari) is one specific form.
- Stick-fighting — Wikipedia — cross-cultural context for why partner-only weapon traditions evolved with supervised pedagogy.
- Studio Kalari — On the regularity of kalari practice — a practitioner-written essay used as reference for the frequency and nasal-breath sections.
Conclusion — Start With One Movement Tomorrow
Do not try to learn the whole system tonight. The student who reads this guide, decides to "go deep," and trains for two hours tomorrow will be sore for a week and never return. The student who picks one stance, one breath, and one fifteen-minute slot tomorrow morning is the one who is still practising in three months.
Pick the horse stance. Pick five slow nasal breaths held in it. Pick tomorrow at 7am. That is the entire instruction.
Everything in this guide — the four exercise families, the thirty-day plan, the safety rules, the body-awareness frame — exists to make that one fifteen-minute slot productive instead of injurious. Use the framework. Trust the slowness. Let the breath rule the intensity. And when, in six to eight weeks, you feel the same mistakes hardening into shape, take that as the system working: it is telling you that the next step is no longer solo.
The first lesson at Kalari University is free — no payment, no commitment. It walks you through one foundation movement with cues, breath patterns, and feedback recorded by Raphael, and gives your home practice a structured starting point alongside whatever you build at home. Create your account and start today →
About the Author
Raphael Gorschlüter — Co-Founder & Head Teacher, Kalari University
Raphael has trained kalaripayattu for over twelve years across Kerala and Tamil Nadu under traditional lineage teachers, and teaches internationally — in Germany, Spain and India. His teaching focuses on developing the felt sense of movement rather than the outer shape, and he has spent the last several years working specifically with adult Western beginners learning at home, online and in workshop intensives. He co-founded Kalari University to make a serious, embodied path into kalaripayattu available to people who do not live within reach of a traditional kalari.
He runs the annual From Mind to Body retreat in Tiruvannamalai, Tamil Nadu, each August.
