12 Somatic Movement Exercises That Actually Land
12 Somatic Movement Exercises That Actually Land (From a 12-Year Teacher)
Most lists of somatic movement exercises read like a yoga warm-up with a different label on it. Five stretches, a breathing exercise, a body scan, and a closing line about the vagus nerve. You do them, nothing lands, you assume somatic work isn't for you. The problem isn't you — it's the list.
A somatic exercise is not defined by how slowly you do it or how soft the music is. It is defined by what it trains: the inner senses that let you feel your body from the inside while it moves. If the exercise doesn't sharpen your perception of where your bones are, what your breath is doing, or what your nervous system is signalling, it is a stretch in a calmer outfit. It is not somatic.
This guide gives you twelve exercises that meet the actual definition. Five come from the recognised somatic canon — Feldenkrais, body scanning, polyvagal breathwork. Three are pulled from traditional Kalaripayattu drills that have trained body awareness for over two thousand years and that almost no English somatic article includes. Four are bridges between the two. Each one is broken down into what it trains, how to do it, what you should feel, the common mistake, and when to deepen it.
A somatic movement exercise is any slow, deliberate movement done with attention on inner sensation — designed to train interoception, proprioception or felt sense rather than to stretch a muscle or build strength. The defining test is whether the exercise sharpens perception of what the body is doing from the inside while it moves. Without that perceptual training, a movement is not somatic — it is just slow.
Key Takeaways
- A real somatic exercise must train interoception, proprioception or felt sense — not just stretch tissue or hold a soft shape.
- The five-exercise lists that dominate the topic fail because they treat somatic work as a style of stretching, not a perceptual discipline.
- Twelve exercises is the right depth for one session — enough to cover all three sensory channels, few enough to repeat daily.
- The fastest-landing somatic exercises pair sensation with breath and ground contact, which is why the Kalaripayattu preparatory drills work so well.
- Most adults feel the first shift in three to seven days of daily ten-minute practice — clearer foot pressure, slower breath, less noise in the head.
- A teacher becomes necessary only when you move past foundational work into loaded patterns, fast sequences, or trauma-related material.
How to Read This List
Five minutes of orientation will save you weeks. Read this before you try the exercises — not after.
Do them slowly. Most people doing somatic work for the first time go at yoga speed. Cut that in half, then in half again. If you cannot feel what your foot is doing while it moves, you are moving too fast for your current sensory bandwidth. The point is not to finish the movement. The point is to perceive it.
Sequence matters. The twelve exercises are not random. They start with the most internal sense (interoception, lying still) and progress to coordinated standing work. Skipping ahead is fine for any single session, but the first time through, do them in order. The early exercises set the perceptual baseline the later ones build on.
Journal one sentence after each. Not a paragraph, not feelings — one factual sentence about what you noticed. "My left hip is heavier than my right." "My breath stops at the top of the rib cage." "I cannot feel my outer left foot." This is the entire feedback loop of a body awareness movement practice — perception, notation, return.
Pain is information, not motivation. None of these exercises should hurt. Mild stretch, novel sensation, the strangeness of slow movement — yes. Sharp pain, pinching, dizziness — stop. Somatic work cannot bypass an injury. It listens to the body, including the parts that say no.
You will not see results by trying harder. This is the opposite of most training. Output ambition makes somatic work less effective, not more. Soft attention, soft body, soft breath, repeated daily — that is the protocol.
The 12 Exercises
What follows are twelve exercises, each a complete unit. For each one you get what it trains (the perceptual goal), how to do it (numbered, concrete), what you should feel (so you can tell whether it is working), the common mistake (so you can fix it without a teacher), and when to add resistance or depth (so you have somewhere to go in week four). The first set is foundational. The middle set is structural. The closing set integrates.
1. Slow Body Scan — The Interoception Baseline
What it trains: Interoception — the perception of what is happening inside your body. This is the foundation of every other somatic exercise. If you cannot feel your body lying still, you will not feel it moving.
How to do it: 1. Lie on your back on a firm surface — floor, mat, blanket. Knees bent or extended, whichever lets the lower back settle. 2. Close your eyes. Take three breaths without trying to change them. 3. Place attention on your right foot. Notice temperature, weight on the floor, any pulsing or tension. Do not move. Do not visualise. Just feel. 4. Move attention slowly up — right shin, right knee, right thigh, right hip. Spend roughly fifteen seconds on each region. 5. Cross to the left foot and travel up the same way. 6. Sweep from pelvis to crown — belly, chest, throat, jaw, eyes, scalp. 7. End by feeling the whole body at once. Open your eyes.
Total time: five to eight minutes.
What you should feel: Most people land somewhere on a spectrum from "I feel almost nothing in my feet" to "I feel a clear, warm weight in every region." Both are fine. The first time, expect blank spots. Those are the exact places the practice is for.
Common mistake: Imagining the body instead of feeling it. If you find yourself visualising a foot, you have stopped doing the exercise. Drop back to actual sensation — pulse, temperature, weight — even if it feels muted.
When to deepen: Once the scan is clear lying down, do it sitting upright. Once that is clear, do it standing with eyes closed. Each posture removes a layer of sensory help and forces the system to work harder.
2. Pelvic Clock — The Feldenkrais Classic
What it trains: Fine-grained proprioception of the pelvis and lower spine. The Feldenkrais Method developed this exercise specifically to map a region most adults cannot feel in detail — the pelvis is often a black box between the legs and the spine.
How to do it: 1. Lie on your back, knees bent, feet flat on the floor about hip-width apart. 2. Imagine a clock face on your pelvis. Twelve o'clock is at the pubic bone, six o'clock at the tailbone, three and nine at the hip points. 3. Tilt the pelvis very gently toward twelve — the lower back flattens slightly. Then toward six — the lower back arches slightly. Repeat slowly for one minute. 4. Now toward three — the right hip drops, the left lifts. Then toward nine. Repeat for one minute. 5. Make a slow circle — twelve to three to six to nine and back. Then reverse. Two to three rounds in each direction. 6. Rest with feet flat, knees up, and notice how the pelvis sits against the floor now.
What you should feel: Movement in places you usually only feel in stillness. The lower back, sacrum and inside of the hip joint should all be in the conversation. Most people discover one direction is much easier than the other — that asymmetry is useful information.
Common mistake: Moving the legs or rib cage instead of the pelvis. The clock face is small. The movement should be barely visible from outside. If your knees are sweeping side to side, you are doing a different exercise.
When to deepen: Add a second clock face on your chest, moving in opposition. Or do the clock with one knee drawn into the chest, isolating one half of the pelvis. Both versions are in the standard Awareness Through Movement repertoire.
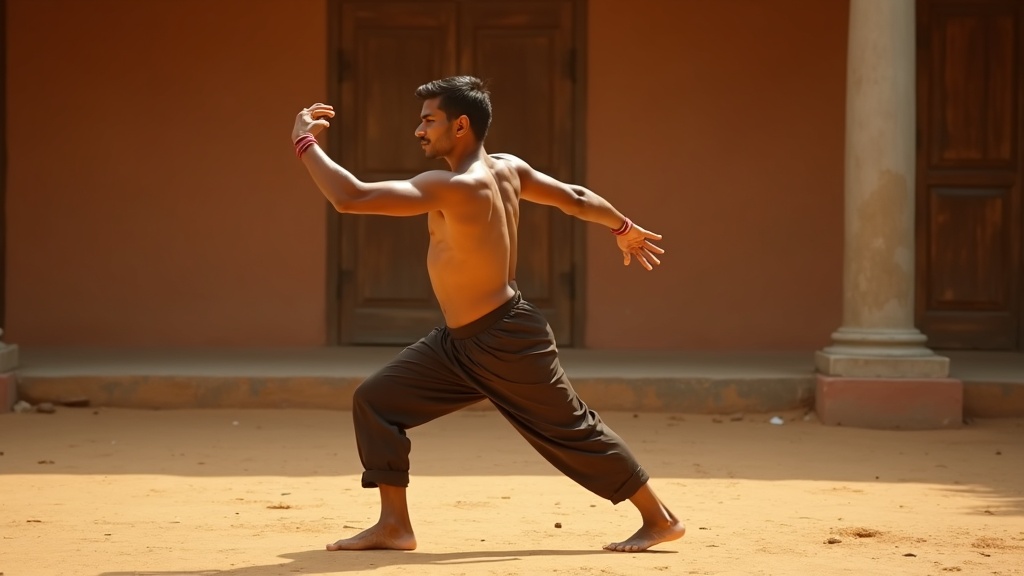
3. The Kalari Standing Foot Press — Vadivu Preparation
What it trains: Ground-contact proprioception and weight distribution through the soles. This is one of the first things a new Kalaripayattu student does in the kalari — before any stance, any kick, any sequence, the feet have to learn what pressing the earth actually feels like.
How to do it: 1. Stand barefoot, feet hip-width apart, parallel. Arms relaxed. 2. Close your eyes. Imagine each foot has four corners — big-toe ball, little-toe ball, inside heel, outside heel. 3. Press through all four corners of both feet at once. Feel the whole sole make contact with the floor. 4. Shift weight slowly to the right foot over five seconds. The left foot stays in contact, but the right takes the load. Track which of the four corners on the right foot is taking most of the weight. 5. Return to centre over five seconds. Repeat to the left. 6. Now circle the weight around the four corners of one foot — big-toe ball, little-toe ball, outside heel, inside heel. Three slow circles each way per foot. 7. End by standing on both feet and feeling the change. Open your eyes.
Total time: four to six minutes.
What you should feel: A clearer "map" of each foot. Most people discover one foot has a sharp picture and the other is fuzzy, or that they always favour the inside heel and never load the outside edge. You should also feel the calves, ankles and knees adjusting silently to keep balance — proprioception in action.
Common mistake: Going too fast. The whole exercise can be done in twenty seconds, and most people do, which is why it teaches them nothing. Move at the speed where you can name the sensation in each foot as it changes.
When to deepen: Do it with eyes open but soft, then progress to a half-squat (vadivu is built on these low postures). The lower the stance, the more information the feet send up.
4. Diaphragmatic Breath with Hand Witness
What it trains: Interoception of the breath plus parasympathetic-nervous-system access. The hand on the belly is the biofeedback layer — it tells you whether what you think is happening matches what is actually happening.
How to do it: 1. Lie on your back or sit upright in a chair with feet on the floor. 2. Place one hand on the centre of your chest, the other on your lower belly just below the navel. 3. Breathe in through the nose. The belly hand should rise first, then the chest hand. 4. Breathe out through the nose or slightly parted lips. The belly hand drops first, then the chest hand. 5. Do not force. If only the chest hand moves, that is your starting point — note it, return to easy breath, try again next round. 6. Six to eight breaths per minute is the parasympathetic-activating zone. Five minutes total.
What you should feel: Belly expanding outward and slightly down on the in-breath. A widening of the lower ribs sideways. A subtle softening behind the eyes and at the back of the jaw as the breath lengthens. Often, a yawn or sigh halfway through — that is the vagus nerve doing its job.
Common mistake: Pushing the belly out muscularly instead of letting the breath fill it. The hand should rise because air is pulling the diaphragm down, not because you are flexing abdominal muscles. If you feel effort, drop the volume of the breath by half.
When to deepen: Lengthen the exhale until it is twice the length of the inhale. Four in, eight out. This is a recognised polyvagal-informed technique covered in clinical literature like the Cleveland Clinic guide to diaphragmatic breathing.
5. Spinal Wave — A Slow Cat-Cow Variation
What it trains: Segmented spine proprioception. Most adults move the spine in two or three blocks. This exercise asks the spine to articulate vertebra by vertebra, building the perception of the spine as a long chain rather than a stiff column.
How to do it: 1. On hands and knees. Hands under shoulders, knees under hips. Neutral spine. 2. Begin a slow wave starting from the tailbone. The tailbone tips up first, then each vertebra rolls into extension one at a time — lumbar, lower thoracic, upper thoracic, cervical, crown of the head reaching forward and up. Take ten seconds for the full inhale wave. 3. Reverse — chin tucks toward chest first, then each vertebra rolls into flexion from the top down, ending with the tailbone curling under. Ten seconds for the full exhale wave. 4. Repeat six rounds. Each round should feel slightly clearer than the last. 5. End in neutral, sit back on heels for thirty seconds, notice what the spine feels like.
What you should feel: A wave that genuinely starts in one end and travels through the spine, rather than the whole spine arching or rounding at once. Most people discover one section — usually the mid-back — that wants to move as a single block. That is the area where the practice is building new perception.
Common mistake: Moving the head and pelvis at the same time, which collapses the wave into a normal cat-cow. The whole point is the time delay between the ends.
When to deepen: Do it standing, with the same wave running from tailbone through crown. Once standing is clear, do it sitting cross-legged on the floor. This builds the same articulation in the postures you actually live in.
6. Single-Leg Balance with Eyes Closed
What it trains: Proprioception and vestibular sense — the inner-ear system that tells you which way is up. Closing the eyes removes the visual layer and forces the ankle, foot and inner ear to do the work alone.
How to do it: 1. Stand barefoot near a wall or chair (for safety). Feet hip-width. 2. Shift weight to the right foot. Lift the left foot a few inches off the floor. 3. Find your balance with eyes open. Soften the standing knee — never lock it. 4. Once steady, close your eyes. Hold for as long as the balance stays — even ten seconds is plenty the first time. 5. Open eyes, return left foot to floor. Switch sides. 6. Three rounds per leg.
What you should feel: A constant, fine micro-adjustment in the standing foot and ankle. The whole foot should be alive — toes gripping then releasing, arch lifting, weight shifting through the four corners. The body is making hundreds of corrections per second; you can feel them as a subtle hum if you stay quiet enough.
Common mistake: Tensing the whole body to "hold" the balance. Real balance is constantly moving. If you are stiff, you have stopped balancing and started bracing — you will fall faster, not slower.
When to deepen: Lift the free leg higher. Or add slow movement — slowly draw the lifted knee toward the chest, then extend the leg forward, all with eyes closed. Each variation is a heavier load on the same system.
7. The Kalari Hip Opener — Meipayattu Introduction
What it trains: Deep hip mobility plus interoception of the pelvic floor and inner thigh. This is a stripped-down version of a meipayattu sequence used to prepare the hips for low stances. The somatic value is in the slow approach to the end range — most yoga hip openers rush there.
How to do it: 1. Sit on the floor with the soles of the feet together, knees out to the sides — a butterfly position. 2. Hold the ankles, not the feet, and let the knees rest where they fall. Do not push them down. 3. Breathe into the lower belly. As you exhale, lengthen the spine upward — do not lean forward yet. 4. After five breaths, begin a slow forward fold from the hip joints. Move two centimetres at a time. Pause every centimetre and breathe. 5. Stop at the first point where you feel a sustained inner-thigh or hip-socket stretch. Stay there for ten breaths. 6. Slowly walk the hands back. Sit upright. Notice the difference between left and right hip. 7. Lie down on your back for one minute, knees up, and let the hips integrate.
What you should feel: A deep, slow opening in the inner thigh and the front of the hip socket. The pelvic floor often softens noticeably. There should be no pinching at the front of the hip — if there is, you have folded too far.
Common mistake: Pushing the knees toward the floor or grabbing the feet and yanking forward. Both shortcut the perception. The exercise is teaching the hip to open from inside, not from external force.
When to deepen: Move from sitting into a low Kalaripayattu side stance — one leg extended sideways, the other folded under. This is closer to actual meipayattu work and requires a teacher to refine correctly, which is why we put it in the residential retreat and not on a list of solo home exercises.
8. Roll-Down to Forward Fold
What it trains: Sequential spinal articulation under gravity, plus interoception of the back-line of the body. Where the spinal wave (Exercise 5) is on hands and knees with no load, this version stacks gravity onto the same articulation and forces deeper perception.
How to do it: 1. Stand tall, feet hip-width apart, knees soft. 2. Take one slow inhale to lengthen the spine. 3. On the exhale, start a roll-down from the crown of the head. Chin tucks first, then the cervical spine rolls down vertebra by vertebra. Then the thoracic spine. Then the lumbar. 4. Let the arms hang. Let the head be heavy. 5. The roll-down should take fifteen to twenty seconds. Most people finish in three. 6. Hang at the bottom for three breaths. Let the back release. 7. Roll up the same way — tailbone curls under first, then lumbar stacks, then thoracic, then cervical, then the head floats up last.
What you should feel: A wave of weight travelling down the spine on the way down, and a wave of stacking on the way up. The hamstrings will tell you whether they have anything to say. The back of the neck should feel the head as a real weight.
Common mistake: Hinging at the hips first, which turns the exercise into a straight-back forward fold. The whole point is spinal articulation under gravity — if the back stays straight, you are doing a different exercise.
When to deepen: Do it with eyes closed (slowly — the vestibular system has to track the head dropping). Or do it with a slow breath count, four seconds per third of the spine on the way down and the way up.
9. The Polyvagal Sigh — Stanford's Research-Backed Reset
What it trains: Rapid parasympathetic activation. A 2023 Stanford study published in Cell Reports Medicine found that this specific breath pattern reduced anxiety and improved mood faster than equivalent mindfulness practice. It is the most evidence-backed single exercise in the entire field of breathwork.
How to do it: 1. Sit or stand comfortably. Breath through the nose. 2. Take one full inhale through the nose. 3. At the top of that inhale, take a second short inhale through the nose — sip a little more air on top. 4. Exhale slowly and fully through the mouth, longer than the combined inhale. 5. Repeat three to five rounds — or do a single round any time you need a reset.
What you should feel: A small wave of release on the long exhale. A slight drop in the shoulders. The chest unclenching. Many people describe a quiet "let-down" sensation behind the breastbone — that is exactly the vagal signal the exercise is recruiting.
Common mistake: Hyperventilating by doing rounds too fast. The Stanford protocol used five minutes daily — not five minutes every hour. More is not better here.
When to deepen: Pair it with the body scan (Exercise 1) — one cycle of physiological sigh, then thirty seconds of scanning what changed. The combination is faster than either alone for shifting state.
10. Slow Walking with Felt-Sense Check-in
What it trains: Carrying body awareness into everyday motion. Most somatic exercises are floor-based or stationary, which means the perception they build often does not transfer into how you actually move through your day. This exercise is the bridge.
How to do it: 1. Find ten metres of clear floor — indoors is fine. Barefoot if possible. 2. Stand at one end. Close your eyes for three breaths and feel the body. 3. Begin walking at one quarter your normal speed. So slowly it feels strange. 4. Track the weight transfer through one foot — heel landing, weight rolling to the outside edge, weight crossing to the ball, push-off through the big toe — then the other foot. 5. Every three or four steps, name one thing you feel. "Right hip tight." "Breath shallow." "Left shoulder higher." Just naming. 6. Walk ten metres, turn slowly, walk back. Three lengths total.
What you should feel: The walk you do without thinking has dozens of micro-events per step that you normally never perceive. Slowing down by 75% makes them all visible. You will notice asymmetries — almost everyone does.
Common mistake: Speeding back up after thirty seconds. The exercise only works at the slow speed. If your conscious mind keeps wanting to walk normally, that is the part the practice is reaching.
When to deepen: Take the slow walk outside — uneven ground, real terrain. Or pair it with the diaphragmatic breath (Exercise 4) — one full breath every two or three steps. This is the version of slow walking taught in many Vipassana walking-meditation lineages.
11. The Kalari Floor Spiral — Chuvadu Preparation
What it trains: Whole-body coordination, spinal rotation under load, and the spatial proprioception specific to ground work. Chuvadu are the foot patterns and floor sequences of Kalaripayattu — among the most demanding somatic work in any movement tradition. This is the simplest entry point.
How to do it: 1. Sit on the floor, knees bent, feet flat, palms behind you on the ground. 2. Drop the right knee to the left across the body, letting the right hip rotate. The left knee can lift slightly. 3. From there, push gently with the hands and roll the torso onto the right hand, ending in a side-lying support — right palm down, left foot stepping over and planting in front. 4. Reverse the spiral back to sitting. 5. Now to the other side. Slow. Each spiral should take fifteen to twenty seconds. 6. Three to five per side.
What you should feel: The whole body solving a small spatial puzzle. The spine spirals, the shoulders track, the hips re-orient. There is no single muscle doing the work — it is a coordinated chain. The first few times, you will feel clumsy. That is the perception waking up.
Common mistake: Trying to muscle through it instead of letting the body find its path. The exercise is teaching the body to organise itself across a transition. If you force it, the organisation doesn't happen.
When to deepen: Add a low stance arrival at the end of the spiral — push up into a half-squat instead of side support. Or chain several spirals together into a flowing sequence. The full chuvadu repertoire is taught inside the traditional curriculum under a teacher's eye.
12. Body-Mind Listening Pose — The Closer
What it trains: The integration layer. Every exercise you have done has changed the body's information state. This pose lets the nervous system absorb it without adding more input. Without this step, much of what the practice built dissipates within minutes.
How to do it: 1. Stand still, feet hip-width, eyes soft or closed. 2. Drop your arms. Soften the jaw, the shoulders, the belly. 3. Do nothing. Do not scan. Do not breathe in any pattern. Do not check posture. 4. Notice what is here, without changing it. 5. Stay for two to three minutes. 6. Open your eyes slowly. Look at the floor first, then the room. Walk away gently.
What you should feel: Stillness that is full, not empty. Body weight settled into the feet. Breath finding its own rhythm. Mind quiet in a way it usually isn't — not because you forced it to be, but because the body is no longer broadcasting noise. This is the felt sense of "grounded" that the whole practice points toward.
Common mistake: Skipping this exercise because it feels like "doing nothing." It is the most important exercise in the sequence. The other eleven create information. This one lets the system integrate it.
When to deepen: Lengthen the standing time gradually — five minutes, then eight. Or do the same closing in seated meditation posture. Once familiar, the felt sense from this pose becomes available in normal life — in line at the supermarket, at your desk, before a difficult conversation.
How to Build These Into a 10-Minute Daily Practice
Twelve exercises is the complete menu, not the daily portion. Doing all twelve every day is a forty-minute session — fine if you have it, unrealistic for most people. The condensed daily version uses six of the twelve and takes ten minutes.
The sequence:
- Body scan (Exercise 1) — two minutes lying down
- Diaphragmatic breath with hand witness (Exercise 4) — one minute, still lying down
- Pelvic clock (Exercise 2) — two minutes
- Spinal wave (Exercise 5) — two minutes on hands and knees
- Standing foot press (Exercise 3) — two minutes
- Body-mind listening pose (Exercise 12) — one minute standing
The structure goes from most internal (lying still, eyes closed) to most integrated (standing, eyes soft, body alive). Every session ends with the closer because the closer is what makes the practice land.
Variations to rotate through the week:
- Monday: Standard sequence above.
- Wednesday: Swap the spinal wave for the roll-down (Exercise 8). Adds gravity load.
- Friday: Swap the standing foot press for single-leg balance (Exercise 6). Adds vestibular load.
- Saturday or Sunday: Longer session — add the Kalari hip opener (Exercise 7) and the floor spiral (Exercise 11). Twenty to thirty minutes total.
- Anytime you need a reset: One round of the polyvagal sigh (Exercise 9). Thirty seconds.
- Anytime you have walked a lot: Slow walking with felt-sense check-in (Exercise 10). Five minutes.
The non-negotiable variable is daily-ness. Ten minutes every morning will outperform an hour once a week by a wide margin. The practice trains a nervous system, and nervous systems learn by repetition. If you miss a day, restart the next morning. There is no streak.
A deeper version of this build — including how to layer somatic exercises into a Kalaripayattu home practice — is covered in the practice guides on this site.
When These Exercises Aren't Enough
Honesty is more useful than ambition. There are situations where solo somatic exercises will not cover what is needed, and recognising them keeps you from wasting months on the wrong tool.
When a teacher matters more than a list. Once you are past the foundational work and want to load the patterns — faster sequences, deeper stances, work with weapons or partners — you need a trained eye. Photographs and videos cannot see what your hip is doing in a slow squat. A teacher can. The same is true for the traditional drills of Kalaripayattu, which look simple and are not.
When somatic therapy is the right call. If you are working with trauma — diagnosed PTSD, complex trauma, dissociation that gets worse during slow body work — somatic exercises alone are the wrong dose. Find a practitioner trained in Somatic Experiencing, Hakomi, Sensorimotor Psychotherapy or another clinically-validated method. The exercises in this article are educational; trauma work is therapeutic and requires a trained relationship.
When pain is structural. Persistent joint pain, nerve symptoms, herniated discs, or any sharp pain that worsens with movement needs a physical therapist or doctor first. Somatic work can be a brilliant complement to rehab but cannot replace assessment.
When the practice itself stops working. Plateaus are normal — usually they pass with another two weeks of patience. But if a daily practice has stopped landing for a month, it is time to add a teacher, a workshop, or a residential setting. Sometimes the next layer of perception only opens with another person in the room.
The men's embodiment work we teach combines online practice with intensive in-person sessions for exactly this reason — the floor work prepares the body, the live work cracks open what video alone cannot.
Frequently Asked Questions
What are somatic movement exercises, exactly?
Somatic movement exercises are slow, deliberate movements done with attention on inner sensation rather than external shape or output. They train interoception (sensing inside the body), proprioception (sensing where the body is in space) and the felt sense — the three perceptual systems that let you experience your body from the inside. Unlike a stretch, the goal is perception, not range.
How long until somatic movement exercises actually work?
Most adults feel the first shift within three to seven days of a ten-minute daily practice. The first signs are small — clearer foot pressure, slower breath, a less noisy mind during movement. Structural changes in posture, holding patterns and resting tension typically appear after six to twelve weeks of consistent practice.
What is the best time of day for somatic exercises?
Morning is best for most people because the nervous system is fresh and the practice sets the tone for the day. Evening works if your sleep is poor or you spend the day in your head — slow movement before bed shifts you into parasympathetic activity. Avoid practising within an hour of a hard workout when the body is still buzzing.
Do I need any equipment for somatic movement exercises?
No equipment is required for any of the twelve exercises in this guide. A soft floor, a mat or rug, and comfortable clothing are enough. A blanket for lying-down work and a wall for balance practice help but are not essential. The practice is deliberately equipment-free so it travels with you — at home, on the road, in a hotel room.
Can I do somatic movement exercises if I am pregnant?
Most slow, breath-paired somatic exercises are appropriate during pregnancy when adapted — but this is medical territory and the answer depends on your stage, your history and your doctor. The body scan, breath witness and slow walking exercises in this guide are generally low-risk. The deep hip opener and floor spiral should be cleared with a prenatal-qualified teacher. Always consult your healthcare provider before starting any new movement practice during pregnancy.
What is the difference between somatic exercises and yoga stretches?
Yoga stretches typically aim for a shape — a specific pose held for a set duration. The goal is structural: open the hips, lengthen the hamstrings, build flexibility. Somatic exercises aim for a perception — they ask what the body feels while it moves, not what shape it makes. Many yoga poses become somatic exercises when slowed down dramatically and done with sensation as the goal.
Can somatic movement exercises help with anxiety?
Slow, breath-paired movement is one of the most studied entry points into parasympathetic nervous system activity, which is the physiological basis of feeling calmer. We do not make medical claims. What practitioners consistently report — a quieter mind and a more settled body — is consistent with the published research on contemplative movement, polyvagal-informed breathwork and somatic-trauma approaches.
How many days a week should I do somatic exercises?
Daily is the target. Perception is built by repetition, and the nervous system recalibrates each day, so a small daily practice beats a long weekly session. Ten minutes every day will outperform sixty minutes once a week. If you miss a day, start again the next morning — there is no streak to protect, only a relationship to maintain.
Are somatic movement exercises safe for older adults?
Yes — and they are often more useful at fifty or sixty than at thirty, because the gap between movement and felt sense usually widens with age. All twelve exercises in this guide are low-load and floor-based or standing with options to use a wall. The standing foot press and slow walking exercises specifically improve balance, which is one of the most important capacities to maintain as the years go on.
Can men do somatic exercises without it feeling soft or therapeutic?
Yes. Half of the exercises in this guide are martial in origin — they come from Kalaripayattu drills designed to train fighters. The traditional somatic methods (Feldenkrais, body scanning, polyvagal breath) are not gendered either; they were developed by movement scientists for performance and rehabilitation. The therapeutic packaging is marketing — the underlying work is athletic and precise.
What is the difference between somatic exercises and somatic therapy?
Somatic exercises are self-directed body-awareness movement you can learn from a book, video or class. Somatic therapy is a clinical practice — often informed by Somatic Experiencing or Hakomi — delivered by a trained therapist for trauma resolution. The exercises share roots and principles. The therapy requires a trained professional and is not something this article replaces.
Why include Kalaripayattu exercises in a somatic movement list?
Kalaripayattu is one of the oldest continuously practised systems of slow, sensation-paced movement on earth. Its preparatory drills — vadivu (postures), meipayattu (body sequences) and chuvadu (foot patterns) — train interoception and proprioception through deliberate ground contact and breath pairing. The exercises pre-date the word somatic by two millennia but meet every operational criterion the modern field uses.
Sources & Further Reading
- Interoception — Wikipedia — clinical and academic overview of the inner-sensing system.
- Proprioception — Wikipedia — the body's positional sense, foundation of every somatic exercise that involves movement.
- Feldenkrais Method — Wikipedia — origin of the pelvic clock and the broader Awareness Through Movement approach.
- Body-Mind Centering — Wikipedia — Bonnie Bainbridge Cohen's developmental somatic approach, a peer field to the work in this guide.
- Somatic Experiencing — Wikipedia — Peter Levine's clinical somatic approach for trauma.
- Somatics — Wikipedia — the umbrella field, defined by Thomas Hanna.
- Kalaripayattu — Wikipedia — the traditional Kerala martial art that supplies the unique exercises in this list.
- Vagus nerve — Wikipedia — the physiological basis of polyvagal-informed breathwork.
- Cleveland Clinic — Diaphragmatic Breathing — the clinical guide to belly-breath technique.
- Cleveland Clinic — Parasympathetic Nervous System — what calms the body and how to access it.
- Cell Reports Medicine — Brief Breathwork Practices (Stanford, 2023) — the published research behind the physiological sigh.
- NIH — National Center for Complementary and Integrative Health: Yoga, Meditation, and Mind-Body Practices — federal overview of evidence for mind-body work.
- Phillip Zarrilli — When the Body Becomes All Eyes — the academic reference on Kalaripayattu practice and pedagogy.
A Practice You Will Actually Keep
You can read about somatic movement for the rest of the year and learn nothing. You can do five minutes of slow body scanning tomorrow morning and learn something. The work is not complicated. It is only consistent.
If you want a structured way in — one foundational movement per day, with the perception cues built into the instruction — the 7-Day Kalaripayattu Foundations course is exactly that. Seven days, seven exercises, ten minutes each. Built so you can feel the shift by day three rather than read about it. It is the same somatic discipline laid out in this article, but sequenced by a teacher and paced for someone who has never done this kind of work before.
If you are not ready to commit yet, the first lesson of the full Kalari University curriculum is free — start with that. No payment, no credit card. Just a body, a floor, and ten minutes.
About the Author
Raphael Gorschlüter — Co-Founder and Head Teacher, Kalari University
Raphael Gorschlüter has trained and taught Kalaripayattu for over twelve years, in Germany, Spain and India. He is one of Europe's most experienced practitioners of the tradition and works directly with adults who already train but cannot feel their body — the gap somatic movement exercises are designed to close. He teaches a small number of international students each year through Kalari University's online programs, men's embodiment intensives, and the annual residential retreat in Tiruvannamalai at the foot of Arunachala.
